
Finding wall studs is essential when hanging heavy objects like shelves, large mirrors, or TVs. Wall studs typically run from the floor to the ceiling and support your home’s structure while allowing for insulation, electrical wiring, and plumbing. They also provide a solid anchor point for mounting items to your wall¡ªwhich is why it’s so important to find them. Without securely fastening heavy objects into studs, a screw’s weak hold in drywall can give out, even if you’ve used a drywall anchor. This will not only damage your drywall (and the object that falls as a result), but the falling object also becomes a safety risk to anyone nearby.
- 1 Understanding Wall Studs
- 2 Challenges of Finding Studs Without a Stud Finder
- 3 Easy Techniques to Find Wall Studs Without a Stud Finder
- 4 Special Considerations for Plaster Walls
- 5 Comparing Stud-Finding Techniques
- 6 Tips for Success
- 7 Best Product Recommendations
- 8 Frequently Asked Questions
- 9 Conclusion
Understanding Wall Studs
Wall studs are the vertical framing members that run between the floor and ceiling to form the internal structure of a wall. Studs are most often made from 2×4 lumber, measuring 1-1/2 inches by 3-1/2 inches. The studs are positioned with the 1-1/2-inch side facing the drywall and most often 16 inches on center, which means there are 14-1/2 inches of space between each stud. They’re usually spaced 16″-24″ apart and provide stability to walls. Studs can be wood or metal, but wood studs are generally used in residential construction to build the interior and exterior walls in a house.
Common Stud Spacing
- Most residential wall studs are spaced 16″ on center (from the center of one stud to the center of the next).
- Some newer construction or larger homes may have studs spaced 24″ on center.
- Older or custom-built homes may have irregular stud spacing, so verification is important.
Challenges of Finding Studs Without a Stud Finder
While electronic stud finders are readily available, you don’t always need specialized tools to locate studs. Stud finders can be difficult to use on other wall materials like plaster or plywood, and they may give false readings due to wiring, pipes, or inconsistent wall density. Luckily, there are several practical, tool-free methods that require minimal equipment and can be done by DIYers of any skill level. These techniques are especially useful for plaster walls, which are denser and thicker, making stud detection trickier.
Easy Techniques to Find Wall Studs Without a Stud Finder
Below are reliable, time-tested methods to locate wall studs without specialized tools. Each technique is simple, effective, and uses common household items or basic observation skills.
1. Knocking Method
One of the easiest ways to find a stud is to simply knock on the wall. Tapping the wall has a different sound and feel depending on whether you’re over a stud or not.
- Tap lightly on the wall with your knuckles or a small hammer, moving horizontally.
- Listen for changes in sound: a hollow sound means there isn’t a stud, while a solid, dull thud suggests a stud.
- Mark the spot where the sound becomes solid and verify by tapping a few inches to the left and right.
- Avoid tapping too hard to prevent wall damage.
This method is not always precise, so it’s best to combine it with other techniques for accuracy.
2. Measuring from a Corner
Since studs are generally 16″ on center from center to center, learning how to find wall studs is fairly easy using measurements that start in the corner of the room.
- Start at a corner and measure out 16 inches (or 24 inches for some newer constructions).
- Mark this spot and check for a stud using the knocking method or another technique.
- If you don’t find a stud, try measuring 24 inches from the corner instead.
- Once you locate the first stud, measure in 16- or 24-inch increments to find others.
Keep in mind that all rooms aren’t built with studs that are 16″ on center, so there is a chance you’ll find a stud less than 16″ from one corner.
3. Using Electrical Outlets or Switches
The most reliable method to find a stud is to locate a light switch or a power outlet. Electrical boxes are typically attached to studs.
- Find an electrical outlet or light switch on the wall.
- Measure about 16 inches horizontally from the outlet or switch to locate the next stud.
- Tap gently along this line to listen for a solid sound that indicates a stud.
- If possible, remove the outlet cover to see which side the stud is attached to, then measure 16″ from there.
Outlets near doors or corners may have offset studs, so use ones in the middle of the wall for best results.
4. Magnet Trick
An easy method that’s getting a lot of views on TikTok is finding a stud using two household items: a magnet and a piece of string.
- Use a strong neodymium magnet (not a weak fridge magnet) tied to a string or dental floss.
- Start at about four feet from the floor, as studs are often found at this height.
- Slowly drag the magnet across the wall, keeping it about a half-inch away.
- When the magnet sticks, it’s likely hit a nail or screw securing the drywall to a stud.
- Move vertically to confirm the stud’s length and mark the spot.
This method works because the metal screws used to secure the drywall are typically fastened to a stud.
5. Flashlight Technique
A flashlight can help you see small bumps or dimples on the wall where drywall screws are.
- Turn off overhead lights to maximize visibility.
- Hold a bright flashlight parallel to the wall or flush against it, moving it slowly.
- Watch for shadows that highlight small imperfections, such as circular dimples created by drywall screws.
- Locate one dimple, then move the flashlight up and down to find more in vertical alignment, indicating a stud.
This technique is particularly effective for spotting subtle nail or screw heads covered by joint compound.
6. Checking Trim and Baseboards
The baseboards, door trim, and window casings in your home are usually attached to the studs.
- Look for small nail holes along the baseboard, typically spaced 16-24 inches apart.
- Tap above these points to confirm each stud’s position.
- Alternatively, shine a flashlight along the trim to spot filled nail holes, which indicate stud locations.
This method is reliable because trim is almost always nailed directly into studs.
7. Probing with a Thin Nail
When finding a stud is critical, you can probe the wall with a thin finishing nail.
- Choose a thin nail or pin at least 1 inch long.
- Gently push it into the wall where you suspect a stud might be.
- If you feel resistance after about 1/2 inch, you’ve likely hit a stud. If the nail goes in easily, you’re in the space between studs.
- Move over an inch and try again until you hit a stud.
- Patch small holes with spackling compound after locating the stud.
This method is accurate but slightly invasive, so use it in low-visibility areas or where the hole will be covered.
8. Using a Wire Hanger
If you can’t find the stud even after drilling, there’s one more technique you can try.
- Grab a wire hanger and untwist it, fashioning it into a right angle.
- Insert the hanger into a small hole drilled in the wall.
- Fish around behind the wall until the wire makes contact with a firm object, indicating a stud.
- Mark the spot and verify with another method if needed.
This technique is useful as a follow-up to confirm stud locations.
Special Considerations for Plaster Walls
Finding studs in plaster walls can be more challenging due to their density and thickness. Plaster is often applied over wood lath, which is nailed to studs, making the magnet trick particularly effective. However, stud finders may struggle to penetrate plaster, so rely on the following:
- Use a strong magnet or metal detector to locate nails in the wood lath.
- Knock gently and listen for a dull thud, as plaster walls may sound less hollow than drywall.
- Measure from outlets or corners, but be aware that older homes may have irregular stud spacing.
For plaster walls, the flashlight technique also works well to spot dimples or nail heads.
Comparing Stud-Finding Techniques
The table below compares the effectiveness, ease, and tools required for each stud-finding method.
| Method | Ease of Use | Tools Needed | Accuracy | Best For |
|---|---|---|---|---|
| Knocking | Easy | None | Moderate | Quick estimates, drywall |
| Measuring from a Corner | Easy | Tape measure | Moderate | Standard stud spacing |
| Electrical Outlets | Moderate | Tape measure | High | Drywall, reliable reference |
| Magnet Trick | Moderate | Neodymium magnet, string | High | Plaster walls, drywall |
| Flashlight | Easy | Flashlight | Moderate | Spotting dimples, drywall |
| Trim/Baseboards | Easy | Flashlight or none | High | Trimmed walls |
| Probing with Nail | Moderate | Thin nail, hammer | Very High | Confirmation, low-visibility areas |
| Wire Hanger | Difficult | Wire hanger, drill | High | Follow-up confirmation |
Tips for Success
- Combine multiple methods (e.g., knocking and magnet trick) for greater accuracy.
- Be cautious when drilling to avoid hitting wiring, plumbing, or gas pipes.
- Confirm stud locations vertically along the wall to avoid mistaking pipes or conduits for studs.
- For older homes, expect irregular stud spacing and verify measurements carefully.
- If you’re still unsure, consult a professional to avoid damaging your walls or hanging heavy items unsafely.
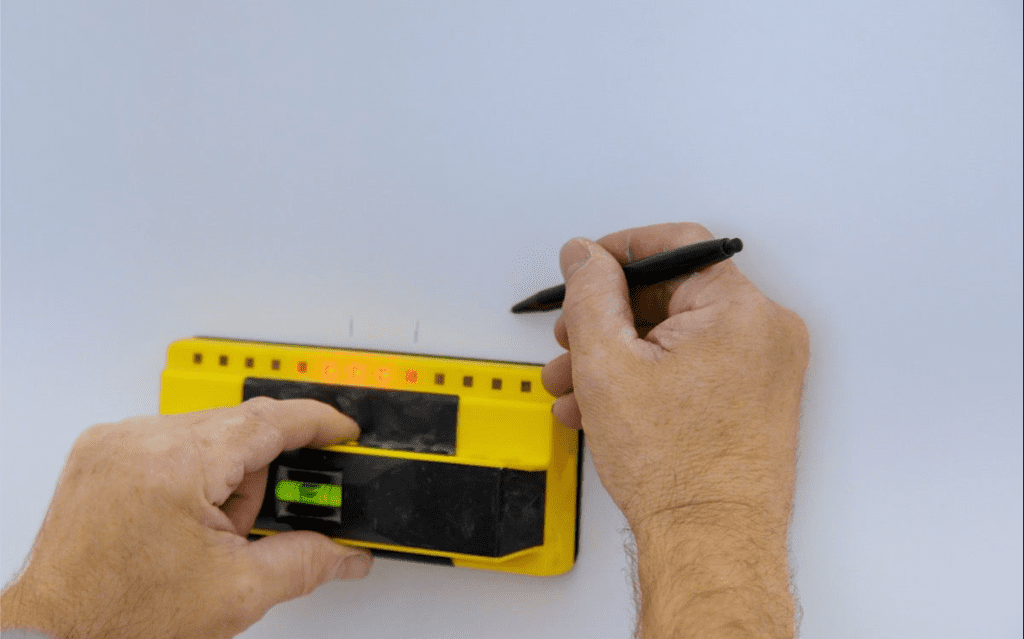
Best Product Recommendations
While these techniques are effective without a stud finder, owning a reliable stud finder can make the process faster and more precise. Here are two highly recommended products available on Amazon:
- CH Hanson 03040 Magnetic Stud Finder: A simple, affordable magnetic stud finder that locates nails and screws with precision, ideal for drywall and plaster walls.
- Franklin Sensors FS710PRO Stud Finder: An advanced electronic stud finder with multi-sensor technology for accurate detection through thick walls.
For heavy items like shelves or TVs, consider using a sturdy wall mount, such as the PERLESMITH TV Wall Mount, which ensures secure attachment to studs.
Frequently Asked Questions
Can I use my smartphone as a stud finder?
Yes, there are stud finder apps that use your phone’s magnetometer to detect metal screws or nails in studs. However, they may not be as accurate as dedicated tools and can sometimes detect other metal objects like wires or pipes, leading to false positives.
How do I know if I’ve found a stud or a pipe?
To avoid mistaking a pipe or conduit for a stud, confirm the location vertically along the wall. Studs run floor-to-ceiling in a straight line, while pipes or wires may curve or appear in isolated spots. Use multiple methods, like knocking and magnets, to verify.
Is it safe to drill into a stud?
Drilling into a stud is generally safe if you’re confident of its location and avoid areas near electrical outlets or plumbing. Use a small drill bit first to confirm you’ve hit wood, and proceed cautiously to avoid hidden wiring or pipes.
What if I can’t find a stud where I need one?
If you can’t find a stud in the desired location, use drywall anchors for lighter items (up to 50 pounds). For heavier objects, consider repositioning the item or consulting a professional to ensure secure mounting.
Do these methods work on exterior walls?
Yes, but exterior walls may have additional insulation or bracing, which can make knocking or magnet methods less effective. Measuring from corners or outlets is often more reliable for exterior walls.
Conclusion
Finding wall studs without a stud finder is entirely possible with these simple, effective techniques. Whether you’re tapping the wall, using a magnet, or measuring from a corner, these methods allow homeowners to tackle DIY projects with confidence. By understanding your wall’s construction and combining multiple techniques, you can locate studs accurately and safely hang heavy items without damaging your walls. For those who prefer a dedicated tool, investing in a quality stud finder can streamline the process for future projects.